
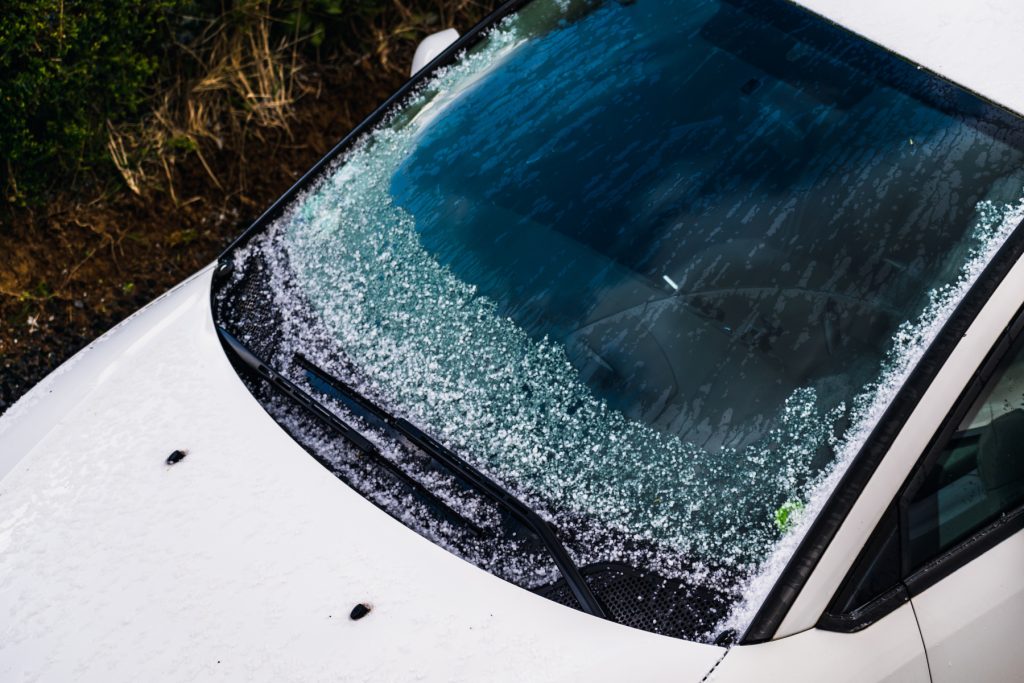

Hail damage is not always obvious. A vehicle may have visible dents after a storm, but smaller paint chips, clear coat damage, cracked paint around a dent, or subtle surface changes can be easier to miss. Identifying these issues early can help you understand the full extent of the damage and choose the right repair method.
If you are checking your vehicle after a hailstorm, focus on both the dents you can see and the areas where the paint or clear coat may have been affected. A professional hail damage inspection can also help uncover damage that is difficult to identify in normal lighting.
1. Check Commonly Overlooked Areas
Start with the parts of the vehicle that take direct impact during a hailstorm. Some damage is easy to overlook because reflections, body lines, trim, and panel angles can hide small chips or surface changes.
Key Areas to Inspect
- Hood, Roof, and Trunk Lid: Large horizontal panels often receive the most hail impact and may show dents, chipped paint, or clear coat damage.
- Edges and Body Lines: Panel edges, creases, and body lines can be more difficult to repair and should be checked closely for cracked or chipped paint.
- Roof Rails and Pillars: Small dents and paint damage can be difficult to see on narrow or curved areas without changing your viewing angle.
- Around Emblems, Trim, and Moldings: Inspect the paint and clear coat around badges, moldings, and other raised exterior pieces where hail impacts may be less obvious.
Do not assume a panel is undamaged just because you cannot see a dent immediately. Hail dents can become much easier to spot when the light changes or when the vehicle is viewed from a different angle.
2. Use the Right Lighting to Find Hidden Hail Damage
Lighting is one of the most important parts of a hail inspection. Repair professionals often use controlled reflection lighting because it makes subtle changes in the shape of a panel easier to see.
Helpful Ways to Inspect the Surface
- Use Angled or Reflected Light: A bright light reflected across the panel can reveal distortions that may indicate a shallow dent.
- Inspect From Several Angles: Move around the vehicle rather than looking straight down at the surface. Small dents often appear and disappear as reflections move across the panel.
- Check a Clean, Dry Vehicle: Dirt, water spots, and road film can make paint and clear coat damage harder to evaluate.
A professional PDR light can make hail dents much easier to identify, but you do not need specialized equipment to perform an initial check. Good lighting, a clean surface, and careful observation can reveal many problems that are easy to miss at first glance.
3. Look Closely Around the Edges of Dents
The condition of the paint around a dent can affect how the damage should be repaired. Paintless Dent Repair (PDR) is often a good option when the factory paint remains intact and the metal can be reshaped properly.
Signs the Paint May Be Damaged
- Small Chips: Look for tiny spots where the color coat or primer may be exposed.
- Cracks Around a Dent: Sharp impacts or dents along body lines can sometimes crack the paint at the edge of the damaged area.
- Rough or Irregular Texture: On a clean vehicle, a damaged area may look or feel different from the surrounding finish. Avoid rubbing dirt or debris across the paint while checking it.
If the paint is cracked or chipped, the panel may need more than PDR alone. The correct repair depends on the depth and location of the damage, the condition of the finish, and the construction of the panel.
4. Inspect the Finish Under Different Lighting Conditions
Different lighting can reveal different types of damage. Bright overhead light may expose one set of imperfections, while softer or angled light may make shallow dents and surface defects easier to see.
Simple Inspection Tips
- Try Soft, Diffused Light: Overcast conditions can reduce harsh glare and make scratches, chips, and uneven finish easier to see.
- Use Morning or Evening Light: Lower-angle light can make subtle dents and surface changes more noticeable.
- Change Your Viewing Angle: Walk around the vehicle and look across each panel rather than viewing it from only one position.
5. Watch for Clear Coat or Paint Damage
The clear coat protects the colored paint underneath and gives the finish its gloss. After a severe hailstorm, inspect the vehicle for signs that the finish itself may have been damaged, especially around sharper dents or existing weak spots in the paint.
Possible Signs of Finish Damage
- Loss of Gloss: A localized dull or irregular area may deserve a closer look, although oxidation, previous repairs, and normal wear can cause similar changes.
- Fine Cracks: Cracks near a hail dent can indicate that the finish has been stressed or broken.
- Chipping or Flaking: Missing paint or clear coat should be evaluated so exposed material is not left unprotected.
Not every dull spot, scratch, or chip is necessarily caused by hail, which is another reason a professional inspection can be useful when the source of the damage is unclear.
6. Document the Damage Before Repairs Begin
If you find dents, chips, cracked paint, or damaged glass, document what you see before repairs begin. Photos can be useful when discussing the damage with a repair facility or insurance company.
What to Document
- Take Wide Photos: Photograph the entire vehicle and each affected panel.
- Take Close-Ups: Capture individual dents, paint chips, cracked finish, trim damage, and glass damage when possible.
- Record the Storm Information: Note the approximate date and location of the hailstorm while the information is still fresh.
If you plan to file a claim, our Texas hail damage insurance guide explains how comprehensive coverage, deductibles, estimates, and supplements generally fit into the repair process.
7. Have the Vehicle Professionally Inspected
A driveway inspection is useful, but it cannot always show the full extent of hail damage. A repair professional can inspect the vehicle under controlled lighting, evaluate the condition of the paint, and determine which dents are candidates for PDR and which areas may require conventional body repair, refinishing, glass work, or other repairs.
Why a Professional Inspection Matters
- Hidden Dent Detection: Proper lighting can reveal hail dents that are difficult to see outdoors.
- Paint Evaluation: The technician can determine whether the factory finish is intact or whether paint damage changes the repair plan.
- Complete Repair Planning: Hail damage may involve PDR, conventional repair, glass replacement, trim operations, or a combination of repair methods.
US Hail Repair works through trusted collision center partners across Texas. You can find a US Hail Repair location or, if you are in North Texas, start with our Dallas-Fort Worth hail repair guide.
8. Protect Your Vehicle Before the Next Hailstorm
Once your vehicle has been inspected or repaired, a few practical steps can reduce the risk of future hail damage.
Hail Protection Tips
- Use Covered Parking: A garage or sturdy covered structure provides the best protection when severe weather is approaching.
- Consider a Hail-Protection Cover: A purpose-built padded vehicle cover may help reduce damage when covered parking is not available.
- Monitor Weather Alerts: Local weather alerts can give you time to move the vehicle before a storm arrives.
Do Not Overlook Hidden Hail Damage
Visible dents are only part of what should be checked after a hailstorm. Paint chips, cracked finish, glass damage, and shallow dents can all affect the final repair plan. If you are unsure what you are seeing, a professional inspection can help separate cosmetic surface issues from hail damage that needs repair.
Learn more about professional hail damage repair, compare PDR with traditional body repair, or find a US Hail Repair partner location near you.
If you are starting to notice signs of damage but are not sure what comes next, our complete guide to hail damage repair walks through the process from inspection and insurance to choosing the appropriate repair method.