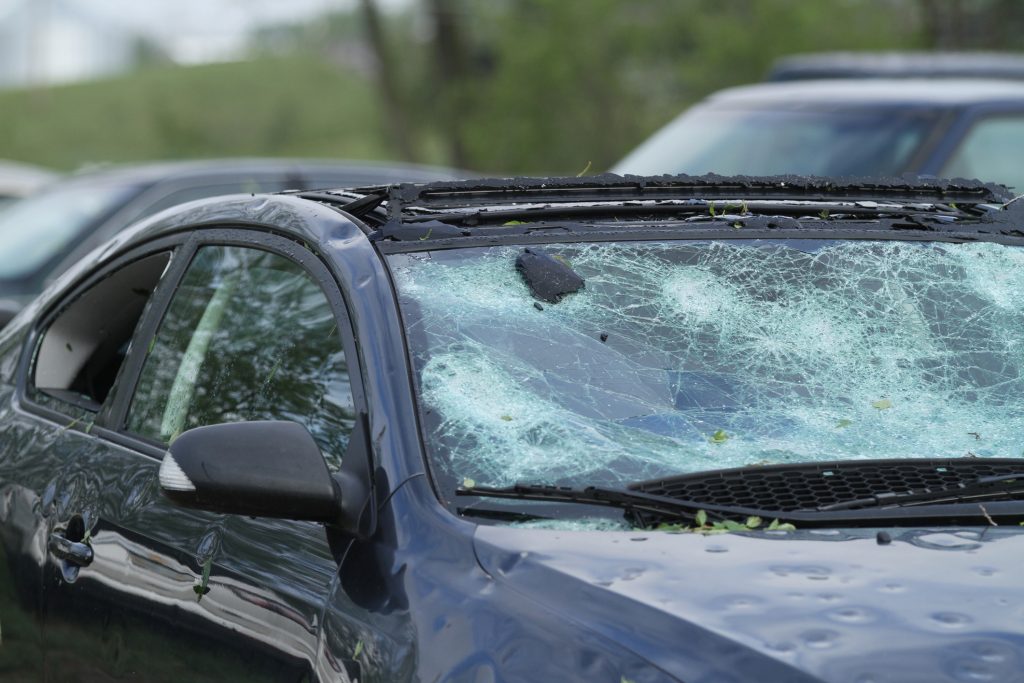
The thunder has faded, the last hailstones have melted, and you’re standing in your driveway surveying what looks like a war zone. Your car, truck, or SUV bears the unmistakable marks of nature’s fury – dimpled metal, cracked glass, and damage that makes your heart sink. While the storm may be over, your work is just beginning, and the actions you take in the next 48 hours will significantly impact your insurance claim, repair quality, and out-of-pocket costs.
The hours immediately following hail damage are critical. Insurance companies have specific reporting requirements, repair shops fill up quickly after major storms, and evidence can deteriorate or disappear if not properly documented. Meanwhile, well-meaning neighbors may recommend contractors, insurance adjusters prepare their schedules, and your phone might start ringing with repair offers that sound too good to be true.
This comprehensive action plan will guide you through every crucial step of the first 48 hours after hail damage, helping you protect your interests, maximize your insurance claim, and set yourself up for quality repairs that restore your vehicle’s appearance and value. The key to success lies in staying organized, acting quickly, and making informed decisions during a time when emotions and stress levels run high.
Hour 0-4: Immediate Safety and Assessment
Safety First
Before you even think about insurance claims or repair estimates, your first priority must be safety. Walk completely around your vehicle, checking for broken glass, damaged mirrors, or compromised structural elements that could pose hazards. Look for sharp edges from damaged trim or glass that could cause injury during your inspection.
Assess whether your vehicle is safe to drive. Cracked windshields can significantly impair visibility, especially if spider-webbing has occurred. Damaged headlights or taillights create safety risks and legal issues. Loose trim pieces or damaged mirrors can become road hazards. If you have any doubts about your vehicle’s roadworthiness, arrange alternative transportation rather than risk your safety or further damage.
Check inside your vehicle for water damage if any glass has been broken. Hail often comes with heavy rain, and broken windows can allow significant water intrusion that damages electronics, upholstery, and interior components. Document any interior damage as thoroughly as exterior issues.
Initial Damage Documentation
Proper documentation begins immediately and forms the foundation of your entire insurance claim. Take comprehensive photographs using your smartphone or camera, ensuring good lighting conditions. If the storm occurred at night, wait until daylight for detailed photos, but take preliminary shots immediately to establish a timeline.
Photograph your vehicle from every angle – front, back, both sides, and from above if possible. Capture wide shots that show the overall extent of damage, then take close-up photos of individual dents, scratches, and broken components. Include reference objects like coins or rulers in close-up shots to help insurance adjusters understand the size and depth of damage.
Document your license plate and VIN number in photos to establish vehicle identity for insurance purposes. Take pictures of surrounding damage – other vehicles, buildings, landscaping – that help establish the severity and scope of the storm. Include shots of any hailstones if they’re still visible, as this helps insurance companies understand the size and intensity of the storm.
Note the exact time, date, weather conditions, and your vehicle’s location when damage occurred. This information becomes crucial for insurance verification and claim processing.
Secure Your Vehicle
If possible, move your vehicle to covered parking to prevent additional damage from follow-up storms or sun exposure, which can make existing damage worse. However, only do this if driving is safe and won’t cause further harm to your vehicle or others.
If glass has been broken, protect your vehicle’s interior from additional water damage using plastic sheeting, tarps, or other waterproof materials. Secure these coverings carefully to prevent them from causing additional scratches or damage. Avoid using duct tape directly on paint or glass, as adhesive residue can complicate repairs.
Resist the urge to attempt temporary repairs yourself. Well-intentioned efforts to “pop out” dents or patch broken glass can actually make professional repairs more difficult and expensive. Insurance companies and repair shops prefer to see damage in its original post-storm condition.
Hour 4-12: Insurance and Documentation
Contact Your Insurance Company
Report your claim as quickly as possible, ideally within the first few hours after discovering damage. Most insurance companies have 24-hour claim reporting systems, and many require notification within 24-48 hours of discovering damage. Prompt reporting demonstrates your diligence and helps prevent any questions about when damage actually occurred.
When speaking with your insurance company, provide a clear, factual description of what happened and the damage you’ve observed. Share your preliminary photos if the company has systems for electronic submission. Ask specific questions about your coverage limits, deductible amounts, and any restrictions on repair shop selection.
Understand your insurance company’s preferred vendor programs versus your right to choose your own repair facility. While preferred vendors may offer streamlined processes, you typically have the legal right to select your own qualified repair provider. Ask about rental car coverage and how to activate it if your vehicle needs extended repair time.
Request information about the claims process timeline, including when an adjuster will inspect your vehicle and how long you have to complete repairs. Some policies have specific deadlines that could affect your coverage if missed.
Gather Essential Information
Locate your insurance policy documents and review your coverage details carefully. Understanding your comprehensive coverage limits, deductible amounts, and any specific provisions related to weather damage helps you make informed decisions throughout the process.
Collect official weather reports and hail size data from the National Weather Service or local meteorological sources. This documentation helps substantiate your claim and provides objective evidence of storm severity. Many insurance companies cross-reference claims with official weather data, so having this information readily available strengthens your position.
Take note of other damaged vehicles in your neighborhood or parking area. Widespread damage in your immediate vicinity supports the legitimacy of your claim and helps insurance companies understand the scope of the storm event. You don’t need detailed documentation of others’ damage, but general observations can be helpful.
Keep detailed records of any expenses related to the damage, including towing costs, temporary repairs to prevent further damage, or additional transportation expenses. Many of these costs may be reimbursable under your policy.
Document Everything
Create a written inventory of all damage you’ve observed, organized by vehicle area (hood, roof, doors, etc.). This written record supplements your photos and helps ensure nothing is overlooked during the insurance inspection.
Note any pre-existing damage to your vehicle, such as previous dents, scratches, or paint issues. Being upfront about pre-existing conditions prevents disputes later and demonstrates your honesty to insurance adjusters. Take specific photos of any pre-existing damage with notes about when it occurred.
Save all communication with insurance representatives, including names, phone numbers, claim numbers, and summaries of conversations. Email follow-up summaries of phone conversations to create written records of important discussions or commitments made by insurance representatives.
Obtain your claim number and direct contact information for your assigned adjuster. Having this information readily available streamlines future communications and demonstrates your organization to insurance personnel.
Hour 12-24: Research and Preparation
Research Repair Options
Begin identifying reputable local PDR specialists and body shops in your area before you need to make repair decisions. Look for providers with strong local reputations, proper licensing and insurance, and specific experience with hail damage repairs.
Read online reviews and check Better Business Bureau ratings, but focus on recent reviews that address similar damage to yours. Pay attention to comments about insurance claim handling, work quality, and customer service throughout the repair process.
Understand the fundamental differences between paintless dent repair (PDR) and traditional bodywork. PDR preserves your vehicle’s original paint and typically costs less while maintaining higher resale value. However, not all damage can be repaired using PDR methods, so you need qualified assessment of your specific situation.
Contact 2-3 qualified repair providers for preliminary assessments. Many reputable shops will provide initial evaluations at no charge, helping you understand the scope of repairs needed and realistic timelines for completion.
Understand Your Rights
Research your state’s laws regarding insurance claims and repair shop selection. Most states give vehicle owners the right to choose their preferred repair facility, regardless of insurance company recommendations or preferred vendor programs.
Learn about the supplement process – how additional damage discovered during repairs is handled and approved. Understanding this process prevents surprises and ensures you’re prepared if repairs reveal more extensive damage than initially apparent.
Familiarize yourself with rental car coverage provisions in your policy. Know how to activate rental coverage, what types of vehicles are covered, and any daily or total limits that apply. Understanding these details helps you plan for transportation needs during repair periods.
Research typical repair costs for your vehicle make and model to understand reasonable price ranges. This knowledge helps you evaluate estimates and identify quotes that seem unusually high or suspiciously low.
Avoid Common Pitfalls
Be extremely cautious of door-to-door solicitors who appear immediately after storm events. While some legitimate contractors do canvas affected areas, many storm chasers use high-pressure tactics and may not provide quality work or honor warranties.
Never sign contracts or authorize work with the first contractor who approaches you, regardless of how urgent they make the situation seem. Legitimate repair providers understand that vehicle owners need time to make informed decisions and will respect your need to research options.
Avoid any contractor who demands significant upfront payment or asks you to sign over your insurance check before work is completed. Reputable repair shops typically work directly with insurance companies and don’t require large advance payments.
Verify that any repair provider you consider has proper business licensing, liability insurance, and workers’ compensation coverage. Ask to see documentation and verify information independently rather than simply trusting verbal assurances.
Hour 24-48: Taking Action
Meet with Insurance Adjuster
Schedule your adjuster inspection as soon as possible, recognizing that adjusters become extremely busy after major storm events. Being flexible with scheduling demonstrates cooperation and may help you get earlier appointment times.
Be present during the adjuster’s inspection and actively participate in the process. Point out all damage you’ve documented, ask questions about anything you don’t understand, and request explanations for any damage the adjuster doesn’t include in their assessment.
Don’t be afraid to respectfully disagree if you believe damage has been overlooked or underestimated. Provide your documentation and photos to support your position, and ask for clarification about any discrepancies between your assessment and the adjuster’s findings.
Take notes during the inspection and ask for copies of the adjuster’s report and estimate. Understanding exactly what damage has been approved for repair prevents misunderstandings later in the process.
Request clear explanations of your coverage, including deductible amounts, coverage limits, and any restrictions or requirements for completing repairs. Get timeline information for claim processing and payment procedures.
Choose Your Repair Provider
Compare quotes, timelines, and warranty terms from the qualified providers you’ve researched. Don’t automatically choose the lowest estimate, as this may indicate inferior materials, shortcuts, or inexperienced technicians.
Verify each potential provider’s experience with insurance claims and their relationships with adjusters. Providers who regularly work with insurance companies understand claim procedures and can help navigate any complications that arise.
Ask detailed questions about warranty coverage – what’s covered, for how long, and how warranty service is provided if issues arise after completion. Get warranty terms in writing rather than relying on verbal promises.
Confirm realistic availability and start dates. After major storms, quality repair shops often have waiting lists, so be suspicious of providers who claim they can start immediately unless they can clearly explain their capacity.
Finalize Your Plan
Review all documentation one final time to ensure you haven’t overlooked any damage or important details. It’s much easier to address issues now than after repairs have begun.
Understand the complete repair process and timeline, including how you’ll be notified of progress and any decisions you’ll need to make during repairs. Clear communication expectations prevent frustration and misunderstandings.
Arrange for rental vehicle coverage if your repairs will take several days or weeks. Understand pickup and return procedures, coverage limits, and your responsibilities for the rental vehicle.
Set clear expectations with your chosen repair provider about communication, quality standards, and completion timelines. Get these agreements in writing to prevent disputes later.
Important Deadlines and Follow-up
Note any insurance deadlines for completing repairs or submitting additional documentation. Missing these deadlines can jeopardize your coverage or create complications in claim processing.
Schedule regular check-ins with your repair provider to monitor progress and address any issues that arise. Staying engaged throughout the process helps ensure quality results and timely completion.
Understand the final inspection process and what happens if you’re not satisfied with completed work. Know your rights and options before repairs are considered complete and final payments are made.
Beyond 48 Hours: Long-term Considerations
During the Repair Process
Maintain regular communication with your repair provider without being intrusive. Most shops appreciate customers who stay engaged and informed rather than disappearing until pickup time.
Be prepared to document repair progress if requested by your insurance company. Some insurers require photos or updates during extensive repairs to verify that approved work is being completed properly.
Address any additional damage discovered during repairs promptly. Hidden damage is common with hail incidents, and most insurance companies have established procedures for handling supplements to original estimates.
Quality Control and Final Steps
Inspect completed work thoroughly before authorizing final payment or signing completion documents. Check repairs in good lighting conditions and don’t hesitate to point out any concerns or questions about the quality of work.
Ensure you receive all warranty documentation and understand exactly what’s covered and how to access warranty service if needed. Keep this documentation with your vehicle records for future reference.
Maintain records of all repairs for your vehicle’s maintenance history. Quality repairs can actually enhance resale value, while poor documentation may raise questions for future buyers.
Protecting Your Investment
Understand how proper repairs affect your vehicle’s value and consider additional protective measures like paint protection film or ceramic coatings that can help prevent future damage.
Keep detailed records of the entire claim and repair process. This documentation can be valuable for future insurance claims, warranty issues, or vehicle sale situations.
Consider whether your experience suggests any changes needed to your insurance coverage or vehicle protection strategies for future storm events.
Key Takeaways
- The first 48 hours after hail damage are critical—prompt action with safety checks, thorough documentation, and immediate insurance reporting protects your claim and ensures better repair outcomes.
- Comprehensive photo documentation from multiple angles, including wide shots and close-ups with reference objects, forms the foundation of a successful insurance claim and prevents disputes later.
- You have the right to choose your own qualified repair provider in most states—don’t feel pressured by insurance preferred vendors or door-to-door contractors who appear immediately after storms.
- Research and verify repair providers before making decisions, focusing on local reputation, proper licensing, insurance experience, and realistic timelines rather than the lowest price.
- Stay organized and engaged throughout the entire process by keeping detailed records, maintaining communication with your repair provider, and understanding all deadlines and warranty terms before authorizing final payment.
Conclusion
The 48 hours following hail damage are critical for protecting your interests, maximizing your insurance coverage, and ensuring quality repairs that restore your vehicle’s appearance and value. By following this systematic approach – prioritizing safety, documenting thoroughly, understanding your rights, and choosing qualified professionals – you’ll navigate this challenging situation successfully.
Remember that while dealing with hail damage feels overwhelming, thousands of vehicle owners face similar situations every storm season. The key to success lies in staying organized, acting promptly, and making informed decisions based on research rather than pressure or emotion.
The investment in time and attention during these crucial first 48 hours pays dividends through smoother insurance processes, better repair outcomes, and peace of mind knowing you’ve protected your interests throughout the process.
For a complete breakdown of what happens next, read our complete guide to hail damage repair.
Don’t navigate the complex world of hail damage claims and repairs alone. Our experienced team understands the insurance process and specializes in restoring storm-damaged vehicles to their original condition. Contact us today for expert guidance and professional service that puts your interests first.